-
-
Suite 1, Floor 2, Wing C, Alhaji Adenekan Plaza, Okota Road, Isolo, Lagos State, Nigeria
Blog Details
06
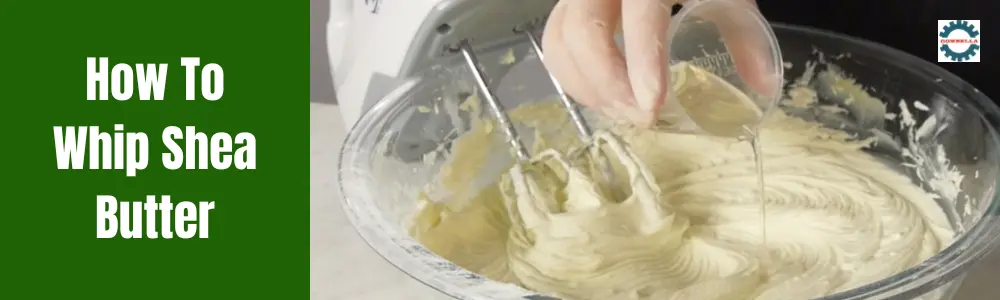
MarHow To Whip Shea Butter: Transforming Shea Butter into a Luxurious Treat
How To Whip Shea Butter: Transforming Shea Butter into a Luxurious Treat
Contents
Have you ever dreamt of transforming a jar of solid shea butter into a cloud-like, fluffy treat? Well, dream no more! As a staff member at Gombella Integrated Services Limited, a company dedicated to exporting high-quality shea butter, I’m here to unveil the secrets behind whipping shea butter. This simple process unlocks a world of possibilities, allowing you to craft a luxurious, personalized skincare product tailored to your individual needs. So, grab your shea butter and electric mixer, and let’s embark on a journey to whip up some self-care magic!
Beyond the Jar: Unveiling Whipped Shea Butter
Unrefined shea butter holds numerous benefits for skin health, offering deep hydration and nourishment. However, its naturally solid texture can sometimes feel heavy and greasy on the skin. Whipped shea butter solves this dilemma by incorporating air into the product, resulting in a lighter, fluffier consistency that’s easier to spread and absorb.
Embracing the Essentials: What You’ll Need
Before diving into how to whip shea butter, gather the following essentials:
- High-quality shea butter: Opt for unrefined shea butter for the most natural experience. Ensure it’s sourced from a reputable company that prioritizes ethical and sustainable practices.
- Electric mixer: A hand mixer or stand mixer is ideal for whipping the shea butter effectively.
- Bowl: Choose a clean, dry bowl large enough to comfortably accommodate the shea butter and allow for expansion during whipping.
- Optional additions: While not essential, some individuals enjoy incorporating essential oils or carrier oils for added fragrance or specific skincare benefits. Research and choose these ingredients carefully, ensuring they are safe for topical application.
The Whipping Journey: Step-by-Step
Now, let’s embark on the exciting process of how to whip shea butter:
- Soften the shea butter: Gently melt the shea butter using a double boiler method. Fill a saucepan with water and bring it to a simmer. Place the bowl containing the shea butter over the simmering water, ensuring the bowl doesn’t touch the water directly. Alternatively, you can soften the shea butter in short bursts in the microwave, stirring frequently to prevent overheating.
- Let it cool: Once softened, remove the shea butter from the heat source and allow it to cool completely at room temperature. This is crucial, as whipping warm butter can result in an oily texture.
- Whip it up: Once the shea butter is cool and solidified, begin whipping with your electric mixer on low speed. Gradually increase the speed to medium as the butter starts to lighten and become fluffy.
- Incorporate additional ingredients (optional): If using essential oils or carrier oils, add them once the shea butter reaches a desired consistency. Be mindful of the quantity, as too much can alter the texture and potentially irritate the skin.
- Embrace the fluff: Continue whipping until the shea butter reaches a light and fluffy consistency, resembling whipped cream. This process can take several minutes, so be patient and scrape down the sides of the bowl occasionally to ensure even mixing.
- Store it right: Transfer the whipped shea butter to a clean, airtight container and store it in a cool, dark place. Whipped shea butter typically has a shelf life of 3-6 months, depending on the storage conditions and any added ingredients.
A Touch of Caution:
While whipping shea butter is a relatively simple process, remember these safety precautions:
- Never heat shea butter directly over an open flame.
- Do not over-whip the shea butter, as it can become greasy.
- Conduct a patch test on a small area of your skin before applying whipped shea butter to your entire face or body.
At Gombella Integrated Services Limited, we are committed to providing high-quality shea butter and empowering individuals to explore its diverse applications. By following these steps on how to whip shea butter, you can create a luxurious and personalized skincare treat for yourself or your loved ones. Enjoy the process and pamper your skin with the delightful texture and nourishing benefits of whipped shea butter!
Author's Details
gombella
Other posts by gombella